21 Layered Hairstyle Ideas for Men That Boost Volume Instantly Now

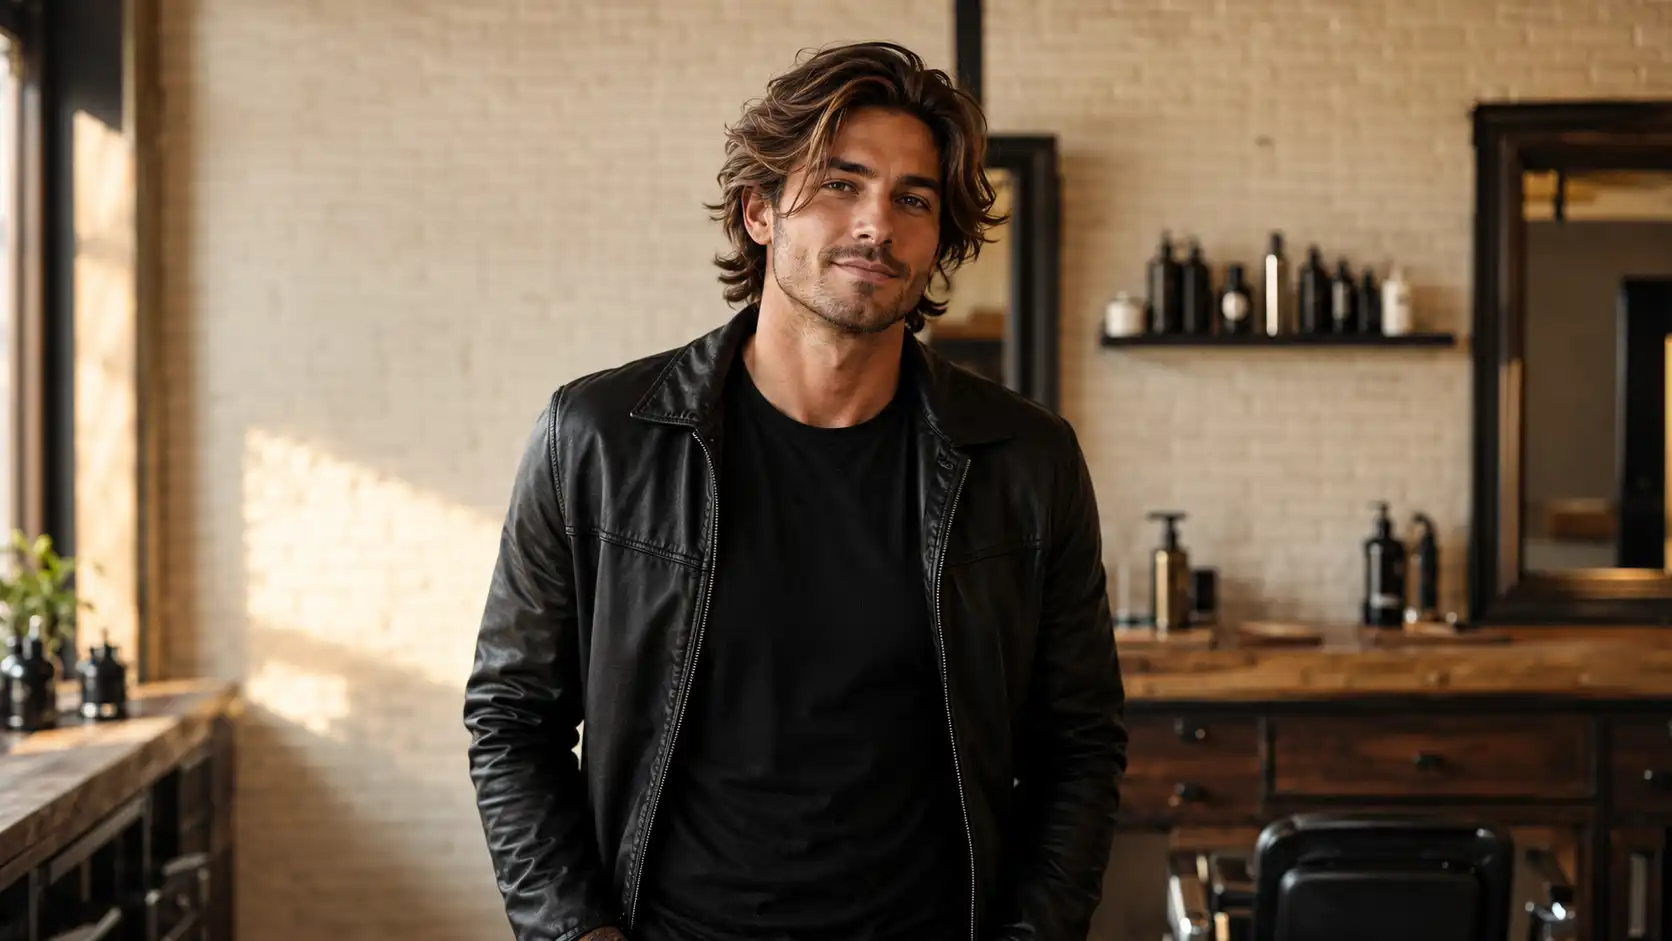
Flat hair is rarely a hair problem. It is usually a cutting problem. When every strand sits at the same length, the whole thing hangs like a curtain and nothing holds anything else up.
Layers fix that by giving the hair different lengths to lean on, so the roots lift, the ends separate, and the shape stays wide instead of collapsing against your head by lunchtime.
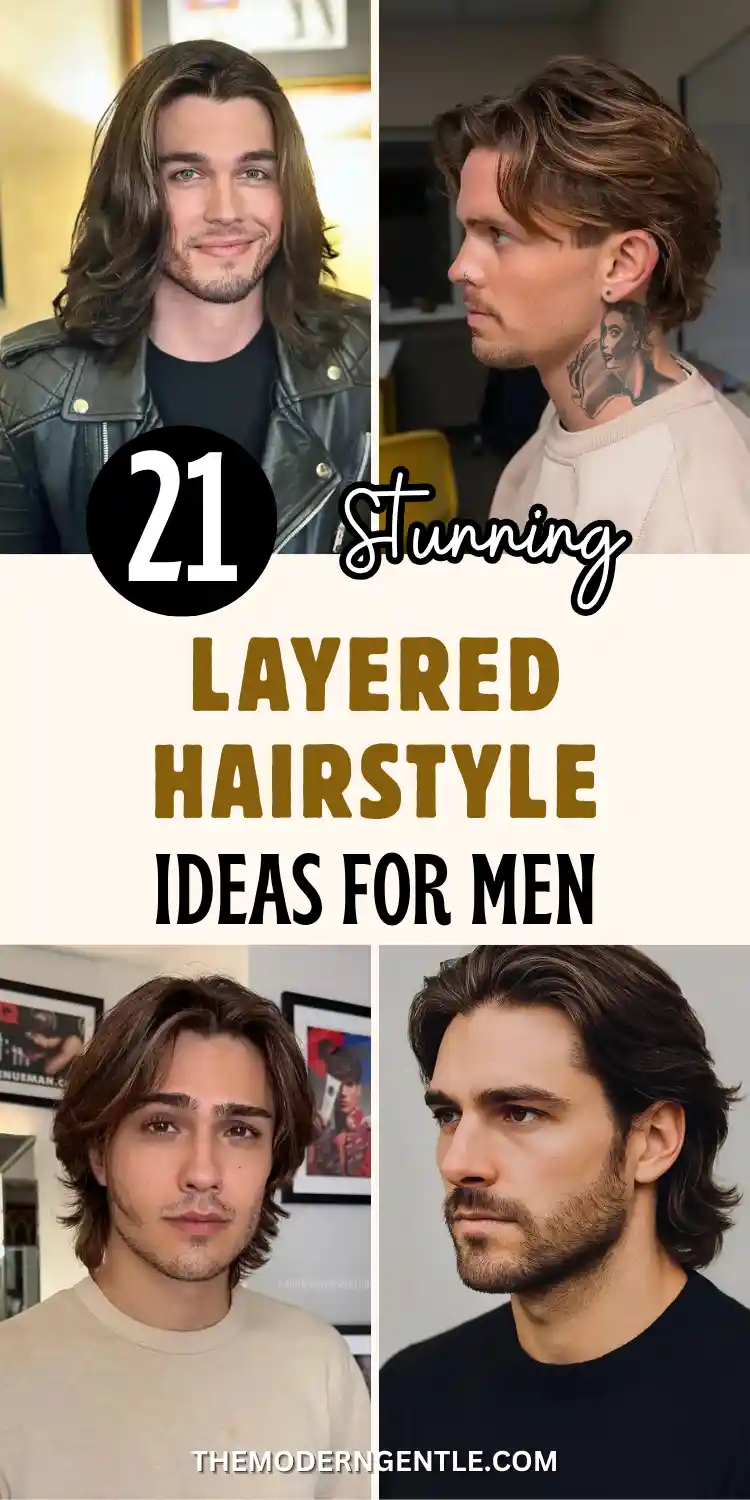
That is the whole idea behind good men layered hairstyles, and it works on fine hair, thick hair, waves, and grey.
The 21 cuts below cover a lot of ground. Shoulder-length flow with ends that flick out, shaggy curtains, stacked layers that build weight at the back, tapered blonde flow, textured crops for guys who own one tub of clay and nothing else, and full blowouts worth twenty minutes of your morning.
Some need a round brush and real effort. Some just need you to stop fighting your natural texture.
Each one includes what to ask your barber for and how to style it, so you can pick the shape that fits your hair type and your patience level.
Men Layered Hairstyles
4 Things That Actually Create Volume
Flat hair is usually a cutting problem, not a hair problem. Tap each card for the fix.
Different Lengths Hold Each Other Up
Tap to see the tip
Why Layers Work
One single length hangs straight down with nothing to lean on. Layers give the hair shorter pieces underneath that prop the surface up, so roots lift and ends separate. Ask for internal layering to strip weight without losing height.
Dry It From Underneath, Not On Top
Tap to see the tip
Drying Direction
Point the nozzle up from below and lift at the roots as you go. Finish with a cool shot to lock the shape in. Drying downward flattens the same cut in half the time.
Contrast Makes The Top Look Fuller
Tap to see the tip
Taper And Balance
Tight sides against a long layered top tricks your eye into reading the top as denser than it is. Keep the taper low, around the ear, so the shape stays soft instead of looking bolted on.
Matte Beats Shine Every Time
Tap to see the tip
Product Choice
Heavy gel welds the layers into one glossy sheet. Reach for clay, paste, or salt spray instead, use a pea-sized amount, and work it through the ends rather than the roots.
Save this for your next barber visit
1. Shoulder-Length Layers With Flicked-Out Ends
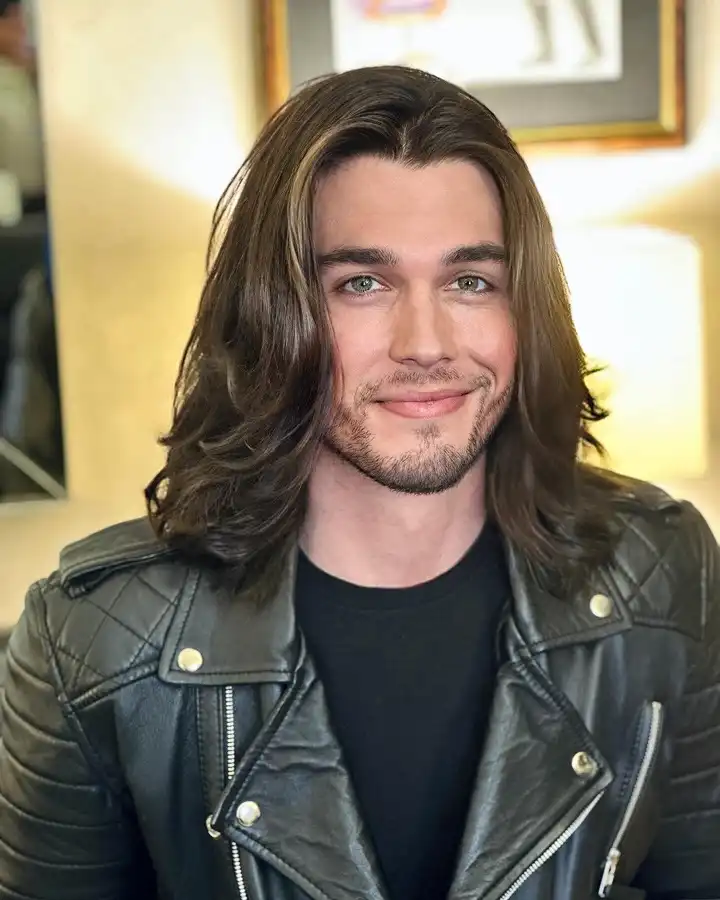
Long hair goes flat at the sides faster than anywhere else, and this cut fixes it with length instead of product.
The layers here start around the cheekbone and get shorter as they wrap toward the back, so the weight sits high and the ends have room to swing outward.
That outward flick at the bottom is doing most of the visible work. It pushes the silhouette wide right where most long hair collapses inward.
A few details worth copying:
- A soft middle part with no hard line, so the roots at the crown stay lifted
- Face-framing pieces cut shorter than the rest, which keeps the front from dragging down
- Ends left slightly uneven rather than blunt, so they separate instead of clumping
The finish looks blow-dried with a round brush, ends turned under first, then flipped out at the last second. Skip that step and you get length without shape.
2. Wavy Layered Crop With A Longer Back
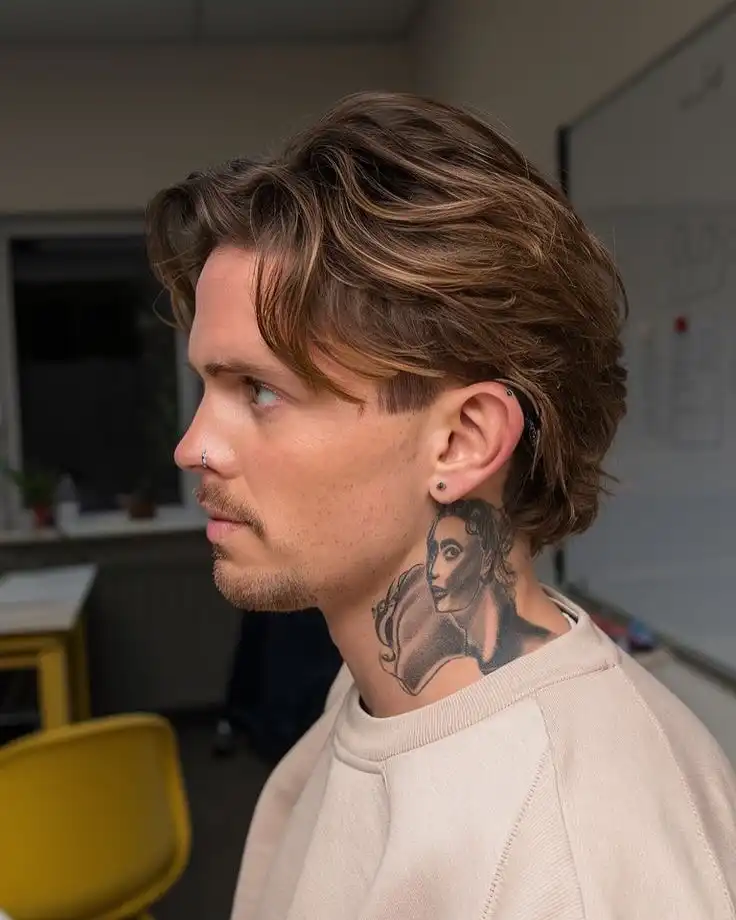
Short sides, loose waves on top, and a tail of length left at the nape. Nothing here is blow-dried into place, and that is the point.
The volume comes from choppy layers cut into naturally wavy hair. Each wave gets shorter as it moves up the head, so the top piles on itself instead of lying down.
Around the crown you can see the hair standing away from the scalp with no product holding it there.
💡 Quick Tip
Ask for layers cut on dry hair if your waves are uneven. Your barber can see exactly how each piece falls and shorten only the ones dragging the shape down.
The sides are kept close but not shaved, which stops the top from looking like a helmet sitting on a bald patch. That balance matters more than the length itself.
Grow the back a little past the collar and the whole thing reads intentional rather than overdue.
3. Swept-Back Mid Length With Layered Ends
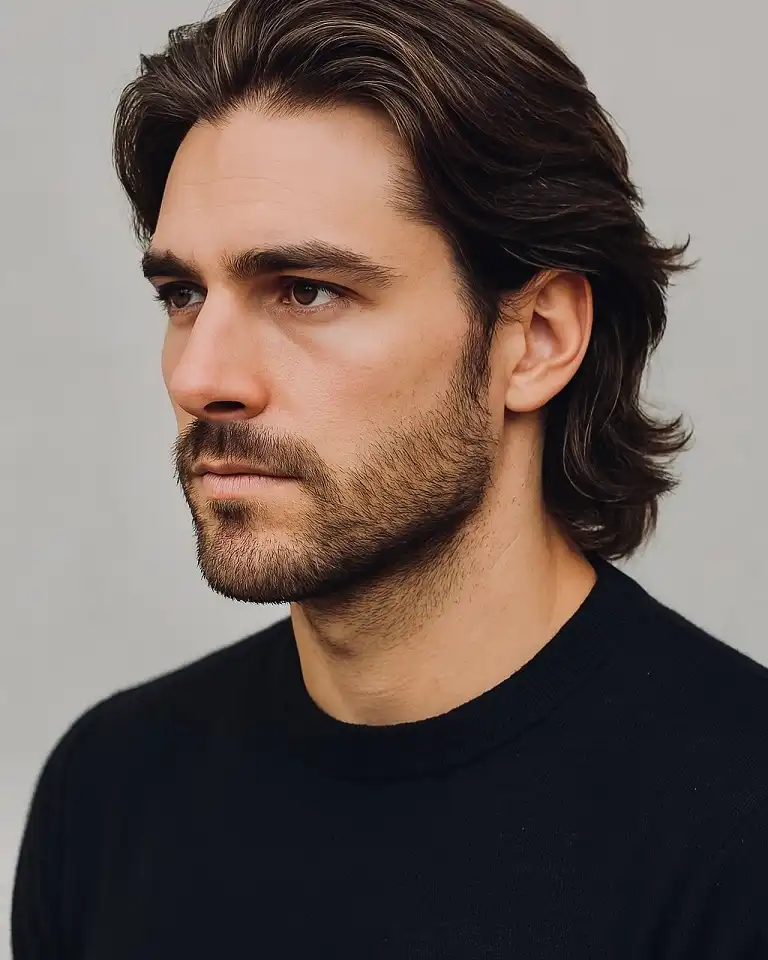
Two ways to wear mid-length hair, and this photo picks the harder one on purpose.
Everything is pushed back off the forehead, which normally flattens the top. It stays lifted here because the layers underneath are shorter than the surface, propping the top section up from below.
The ends at the nape kick out and away from the neck, giving the back a fuller line instead of a straight drop.
The color has subtle warmth through the mid-lengths, which catches light and makes the layers visible rather than one solid block.
| Swept back like this | Worn forward instead |
|---|---|
| Opens up the forehead and jaw | Softens a longer face shape |
| Needs internal layers or it flattens | Needs shorter face-framing pieces |
| Dries best with fingers pushing up | Dries best with head tipped down |
If your hairline sits high, this direction shows it. Worth knowing before you commit.
4. Shaggy Curtain Layers That Frame The Face
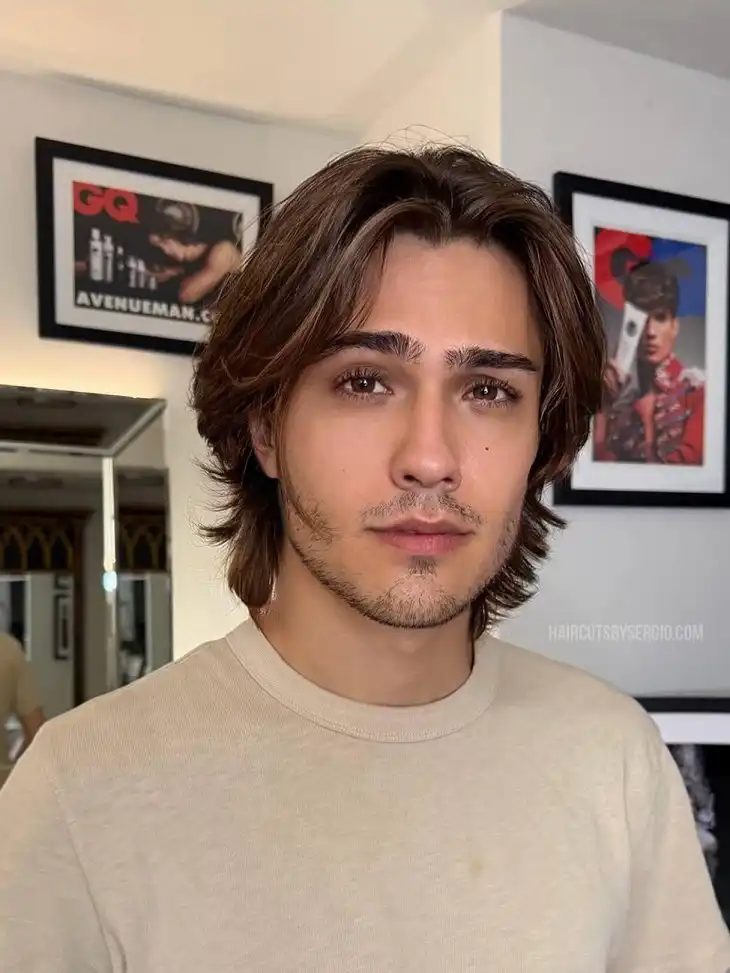
Feathered pieces fall on both sides of a soft center part, splitting at the brow and sweeping outward past the cheekbone.
What makes this one full rather than limp is how many different lengths are packed into the front.
Short flicks near the temple, longer pieces by the jaw, and a few strands left even longer at the sides. Stacked together they hold each other away from the face.
The top is left undercut in weight, meaning thinned from underneath rather than shortened on top. That removes bulk without removing height.
Air drying suits this shape. Heat pulls the curtain flat and you lose the separation that makes it work.
Many short lengths layered into the front hold each other up. One single length just falls.
5. Blonde Layered Flow With A Clean Taper
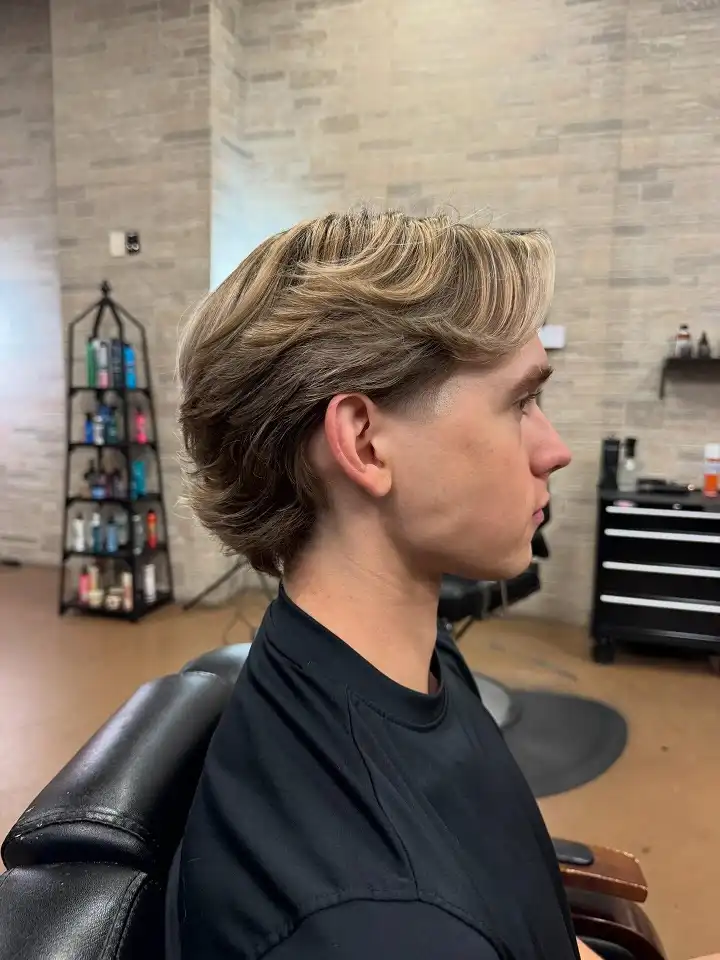
Lighter hair reads thinner in photos, so this cut leans on shape to make up the difference.
The top is left long and layered, swept back and over into a soft wave that sits high above the ear.
Below it the sides are tapered close, which creates a hard contrast: dense on top, tight underneath. Your eye reads the top as much fuller than it is.
Getting a similar result:
Ask for a taper that stays low, around the ear, not up the side of the head.
Keep the top long enough to fold over itself when swept back.
Dry it backward with your fingers, lifting at the roots as you go.
Finish with a light cream, worked through the ends only.
The lighter tone through the top adds one more thing: separation. Every layer catches light differently, so the shape shows.
6. The Modern Shag For Volume Everywhere
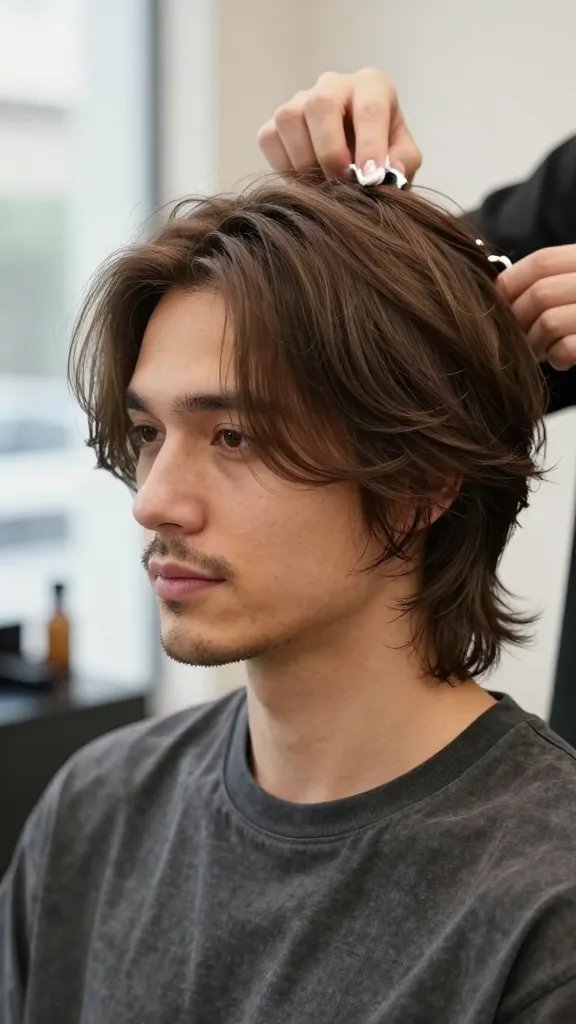
The shag came back, and for once a trend revival actually makes sense. Short-to-long layers pump up the crown and create shape without much effort.
Styling steps:
- Apply a lightweight mousse at the roots before blow-drying
- Scrunch with your hands while it dries to build texture
- Add a touch of cream at the end for soft definition
This is the move if you like a lived-in look. It’s especially good for fine or thinning hair since the layers keep it from collapsing flat by 2pm.
7. Long Layers Brushed Back With Height At The Front
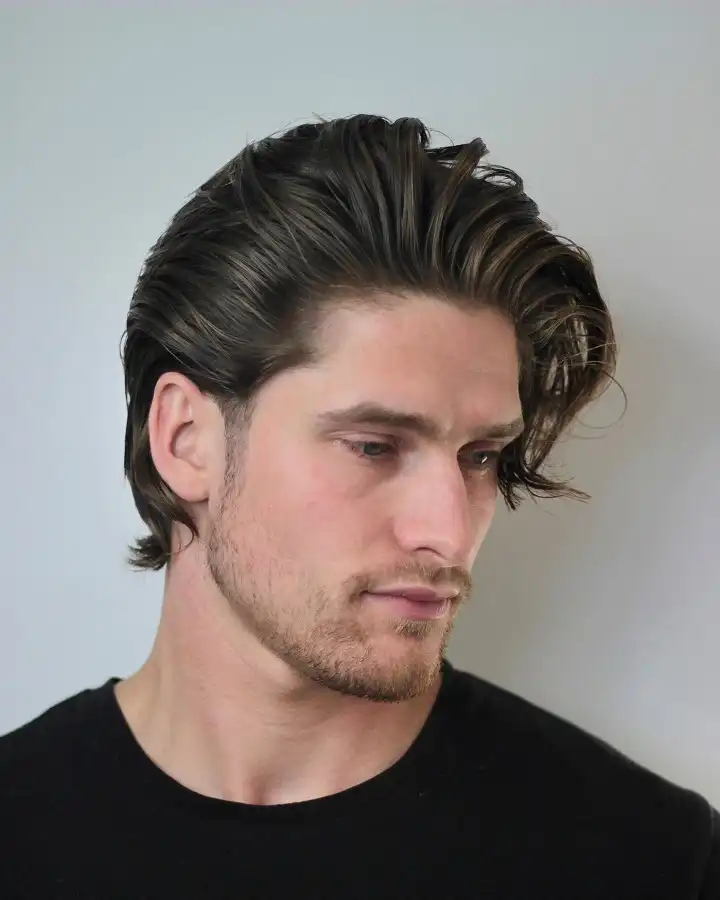
Wet-look styling usually kills volume. This one keeps it because the height is built before the product goes anywhere near the hair.
Look at the front section. It rises off the forehead in a thick sweep, then breaks into loose pieces that fall forward again over the temple.
That break is where the layering starts. Below the surface the hair is cut shorter, so the top has something solid to rest against instead of sliding flat.
The sides stay long enough to tuck behind the ear and reach the collar at the back, which balances all that height up top.
Use a matte paste, not a shine gel. Heavy shine flattens the layers into one glossy sheet.
8. Layered Quiff With Tapered Sides
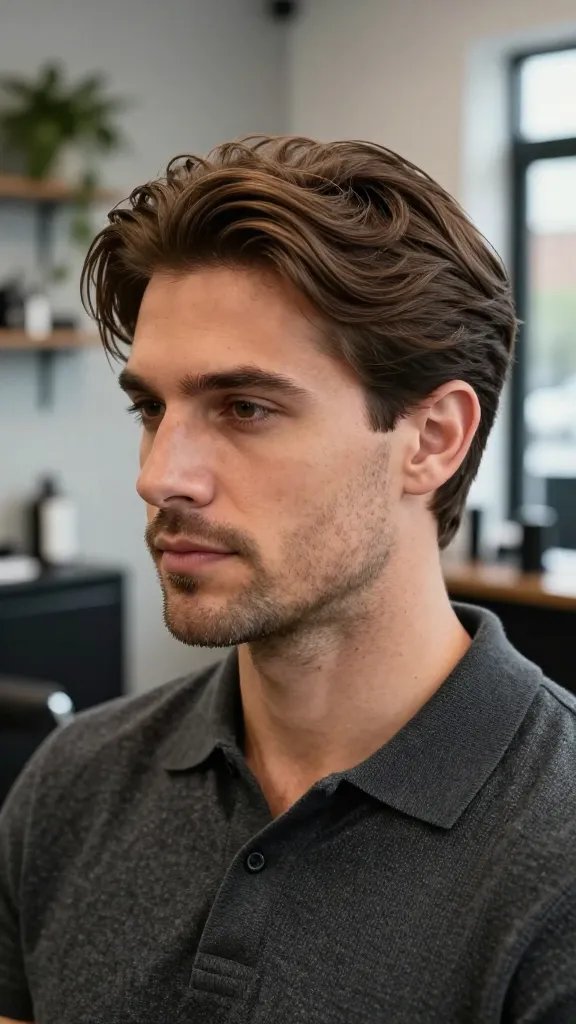
Want height without looking like you sculpted it with a chisel? The layered quiff gives you that lifted front with tapered sides that keep things tidy. It looks put-together without trying too hard, IMO.
How to get it:
- Ask for medium layers on top, low to mid taper on the sides
- Blow-dry forward, then up, using a vent brush
- Finish with a light paste so it stays soft instead of crunchy
This one works for the office and the weekend. It flatters most face shapes and skips the full pompadour commitment.
9. Stacked Layers That Build Weight At The Back
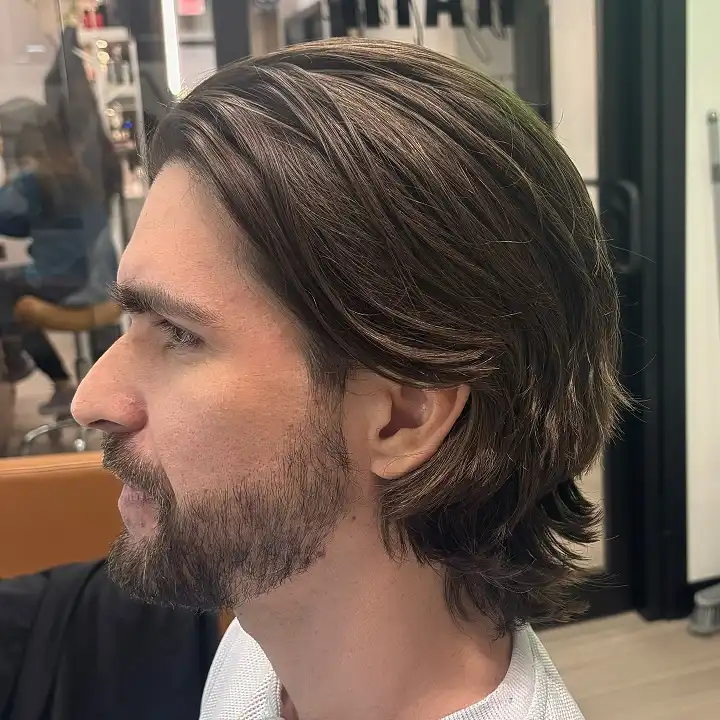
Most guys focus on the front. The fullest part of this cut sits behind the ear.
Layers are stacked from the nape upward, each one slightly shorter than the one below it.
That builds a rounded shelf of hair through the back of the head and pushes the outline outward instead of letting it hang straight. The ends turn out at the bottom, so the silhouette widens right at the finish.
At the front the hair is pushed back and to one side, kept flatter on purpose. The contrast is what sells it.
Ask your barber for
Fine hair benefits most from this one. The stacking creates thickness you do not naturally have.
10. Textured Crop With Choppy Layers
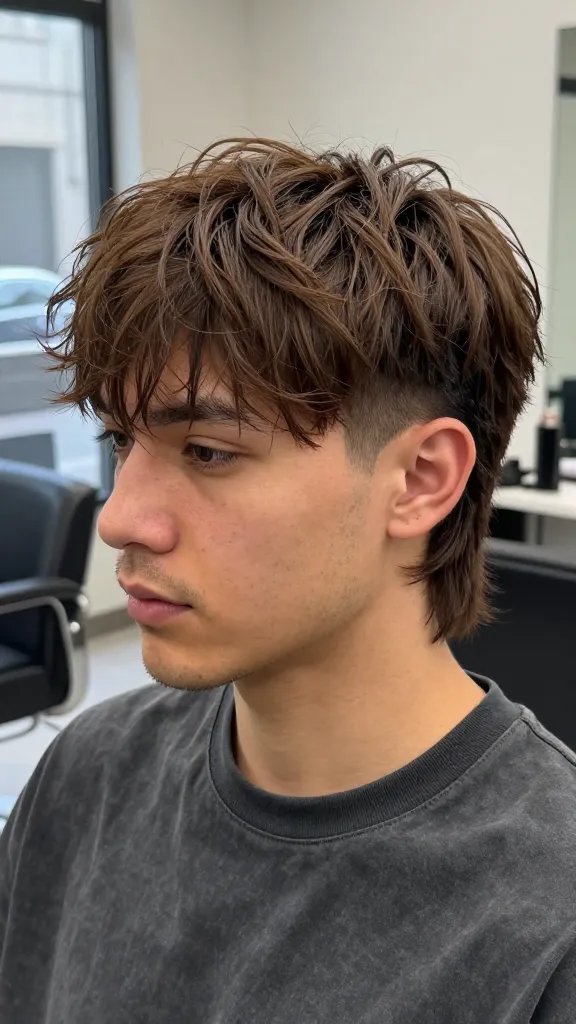
This is the cut for guys who hate styling but still want to look like they tried. Short sides plus choppy layers on top means built-in lift, no blow dryer required.
Why it works:
- Uneven lengths catch light differently, so hair reads thicker than it is
- Short sides push your eye upward, which fakes height
- Matte product shows off the texture instead of drowning it in shine
Grab a pea-sized bit of clay, pinch and twist sections for separation, and you’re done. Works best on straight to slightly wavy hair, and it’s basically a five-minute morning routine.
11. Salt And Pepper Layers With A Lifted Front Wave
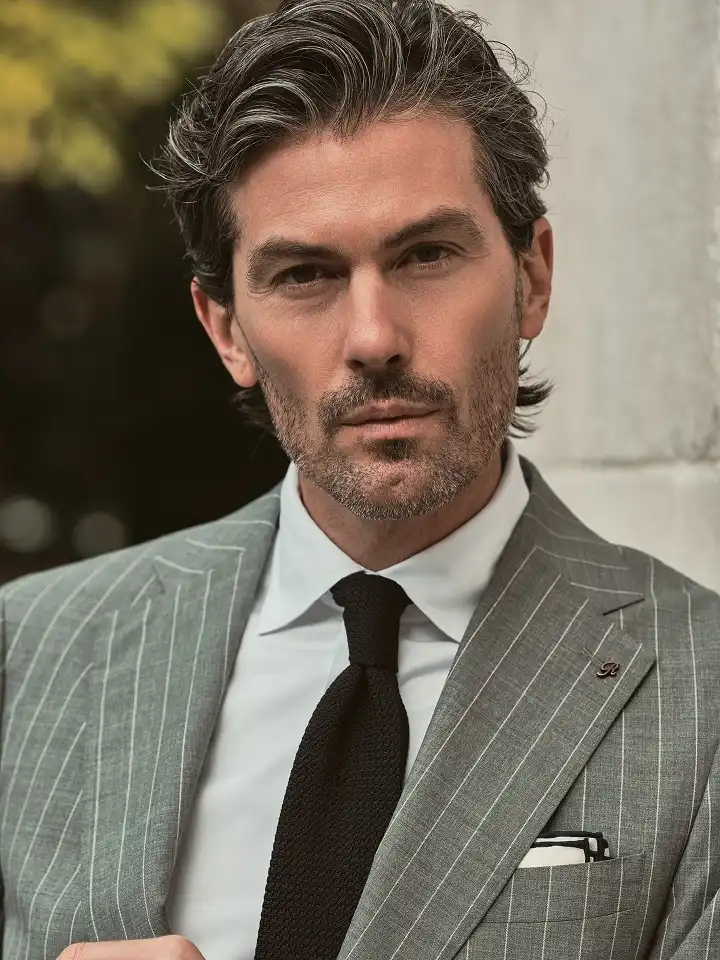
Grey hair changes texture. It goes wiry, drier, and often stands up more than it used to, which is a gift if the cut works with it.
Here the length runs to just below the ear with soft layers cut through the sides and back.
The front is the feature: a thick wave lifted up and swept sideways, with a few strands falling loose near the temple. That looseness keeps the whole thing from looking set.
The silver running through the darker base does something layers alone cannot. Two tones sitting side by side read as more dimension, which reads as more hair.
Let the grey show. The contrast adds visible depth.
Use a conditioner made for coarse hair.
Keep the sides layered so they do not puff out.
Hard-hold gel. It highlights every dry strand.
A rigid side part. It ages the shape.
Cutting the front too short. You lose the wave.
Worn with a suit it looks deliberate. That is not an accident, it is the trim schedule.
12. Feathered Blowout Layers For Serious Lift
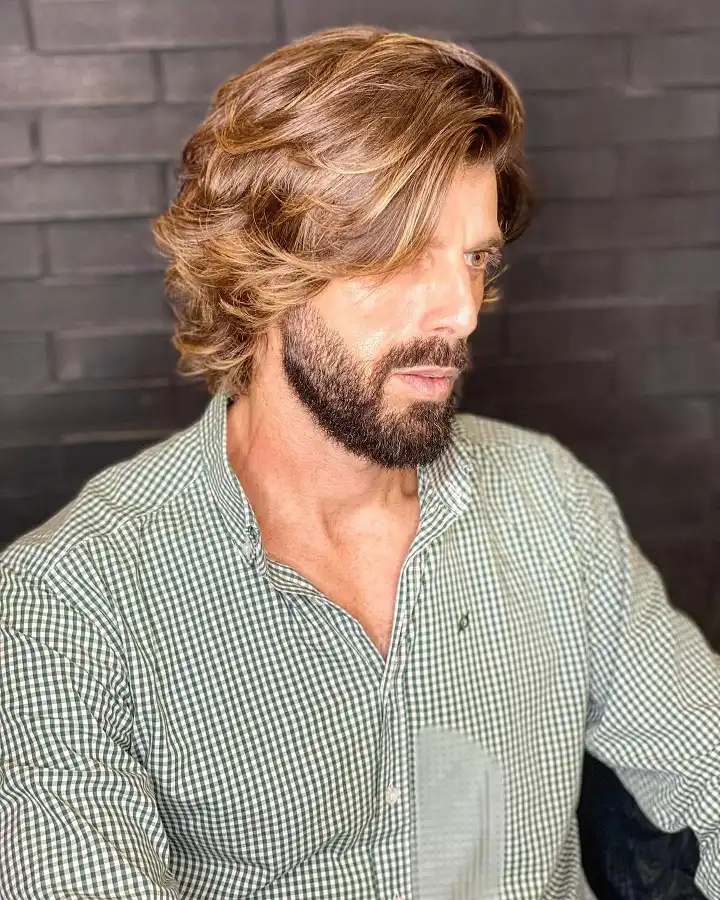
Here is what happens when layers get the full blow-dry treatment.
The hair is mid-length, cut in wide feathered sections that curve back and away from the face, then dried with heat directing every piece upward and outward.
The result sits noticeably higher and wider than the head underneath it. The warm caramel through the mid-lengths makes each curved section separate from the next.
Same cut, but the layers fall and sit close to the head. Length shows, shape does not.
Roots lifted, ends curved back, silhouette wide. The layers finally do their job.
Dry it in sections, always aiming the nozzle from underneath toward the ceiling. Hit it with cool air at the end to lock the curve in.
Fair warning: this one falls by evening unless you set it properly. It is a look you commit twenty minutes to, not five.
13. Wavy Layered Bro Flow
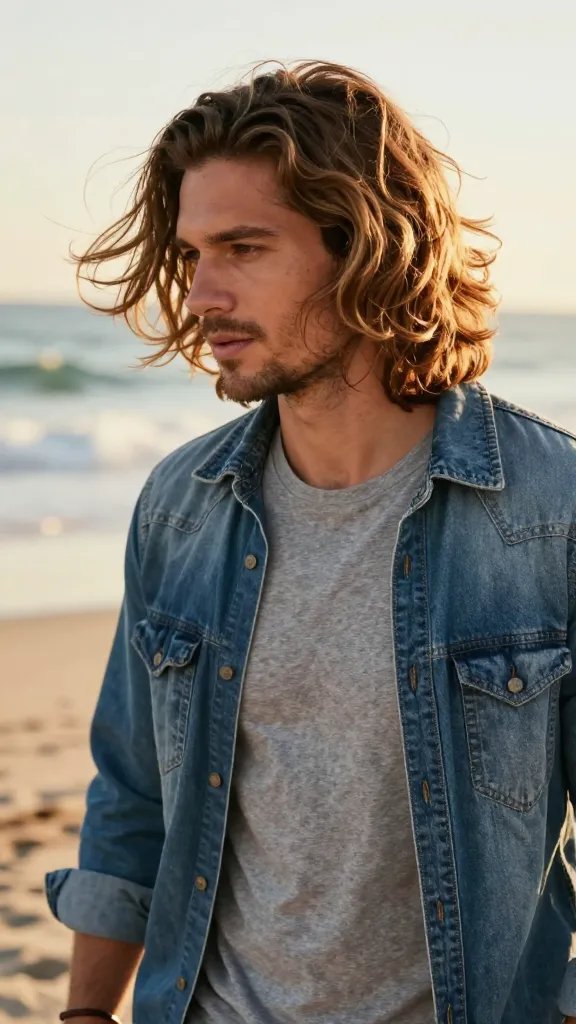
If you’ve got natural waves, stop fighting them. Layering a medium-length flow cuts the bulk and lets the waves bounce instead of clump into one heavy mass.
Key points:
- A longer top with layered sides keeps movement going without that dreaded triangle shape
- Sea salt spray adds grit and pulls out texture fast
- Air-dry it, or diffuse on low, for natural curl definition
This cut is made for guys with wave or curl who want that surfer look without faking it.
Bonus: take a hat off and your hair still looks decent, which honestly never happens with straight hair.
14. Layered Pompadour With Soft Edges
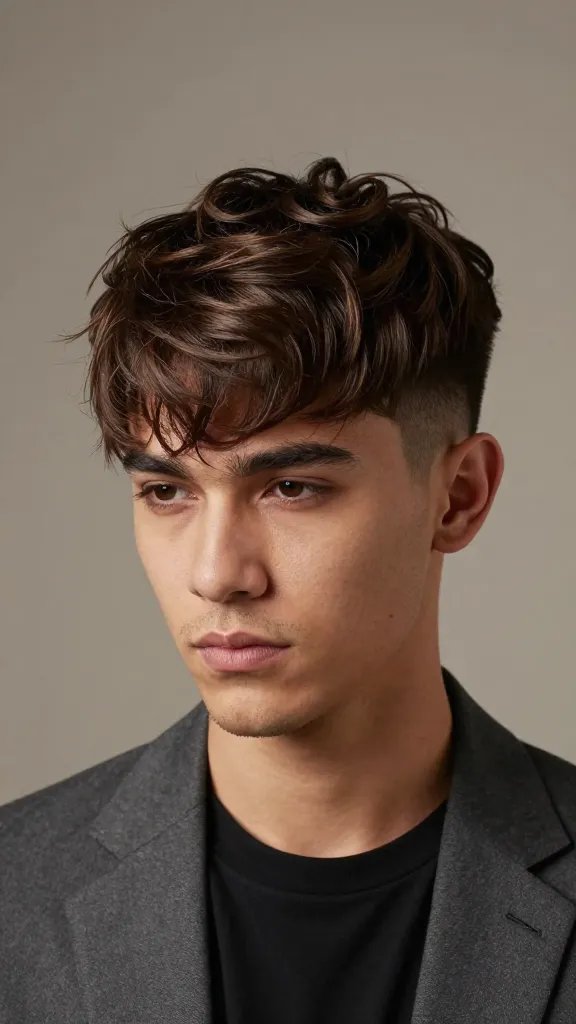
You want height, but helmet hair is a hard pass. A layered pomp gives you lift while staying flexible enough to move naturally.
Pro moves:
- Ask for internal layering to strip out weight underneath
- Blow-dry with a round brush, directing roots upward
- Use a light-to-medium hold cream, not heavy gel
This works great on straight or slightly wavy hair for a dressier look. It photographs well and actually holds shape, unlike the stiff pomps from a decade ago.
15. Layered Undercut With Natural Texture
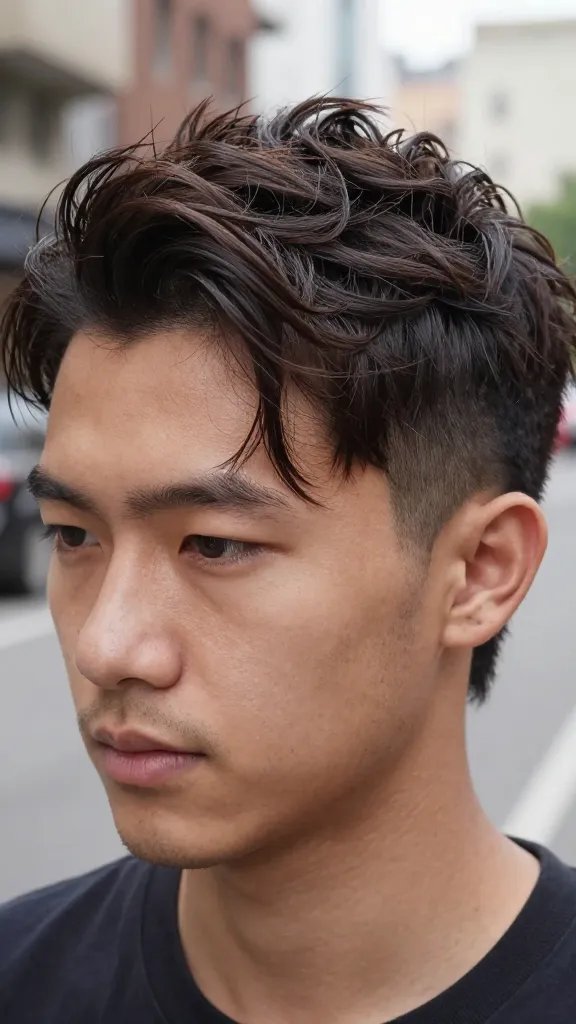
Contrast creates volume. Disconnect the sides, layer the top, and let it fall with movement instead of sitting flat. Edgy, but not “I just left a rock concert” edgy.
What to ask your barber:
- Disconnected undercut on the sides
- Top left long with internal layers for lift and flow
- Texture point-cutting to break up density
Style it with salt spray and light paste for a messy, textured finish. This one transitions easily from work to going out.
16. Layered Fringe With Lifted Crown
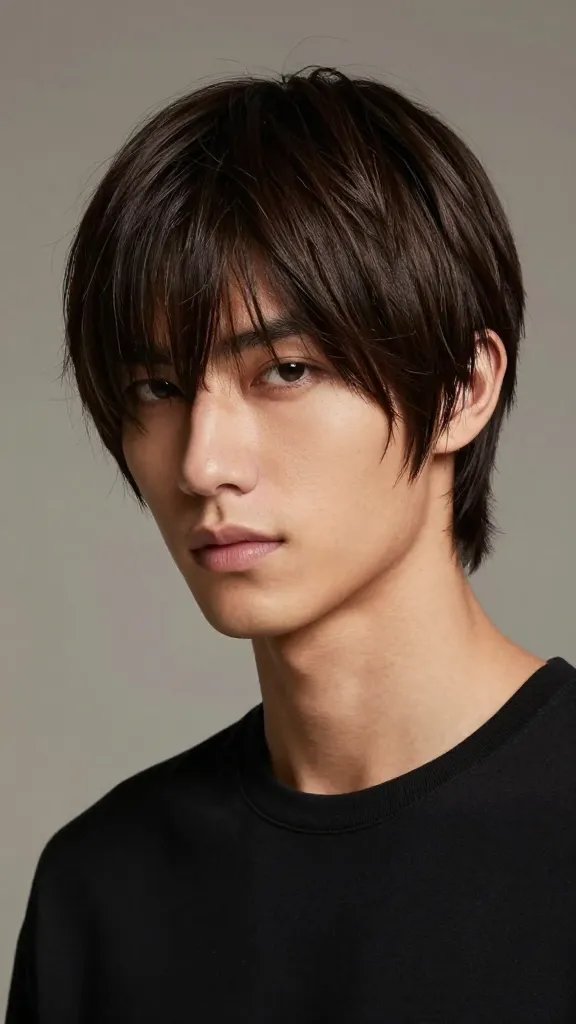
If your forehead runs high, or you just like a fringe, layer it so it doesn’t sit heavy across your face. A lifted crown behind it adds fullness to the whole silhouette.
Tips:
- Keep the fringe slightly longer with micro-layers for movement
- Blow-dry the crown upward to avoid that flat-top-heavy-front combo
- A touch of root powder helps it hold volume all day
This works great on straight hair that tends to fall forward. You get softness up front and height in back, a nice balance most fringe cuts miss.
17. Mid-Length Layered Waves With Curtain Shape
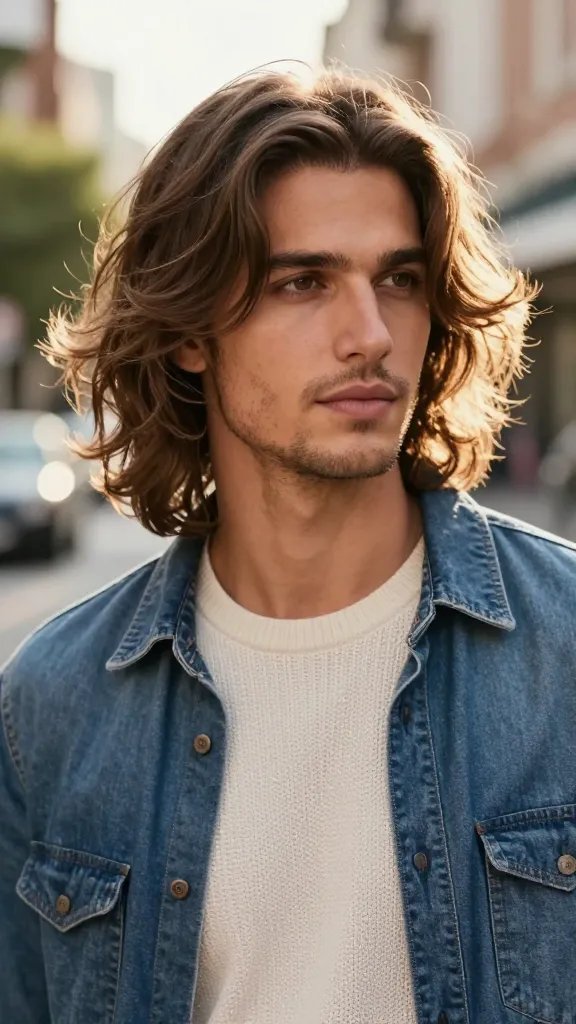
Curtains, but for grown-ups. Mid-length layers open up the face and add bounce on the sides, so the hair looks thick no matter the angle.
Styling notes:
- Center or off-center part, depending on your face shape
- Apply cream or curl enhancer to damp hair for soft definition
- Diffuse or air-dry, then fluff the roots with your fingers
This is the relaxed, effortless-cool look that still piles on volume. It plays well with natural texture and honestly looks better the messier it gets.
18. The Layered Ivy League (With Texture)

Clean and collegiate, but with an upgrade. Subtle layers on top add height and separation while short sides keep everything sharp.
Why it’s good:
- Works for suits and just as well for weekends
- Easy to style: blow-dry up and back, dab of paste, done
- Especially helpful for fine hair that needs a push to stand up
Pick this if you want a timeless look that doesn’t scream effort. It’s polish without the performance.
19. Layered Faux Hawk For Instant Lift
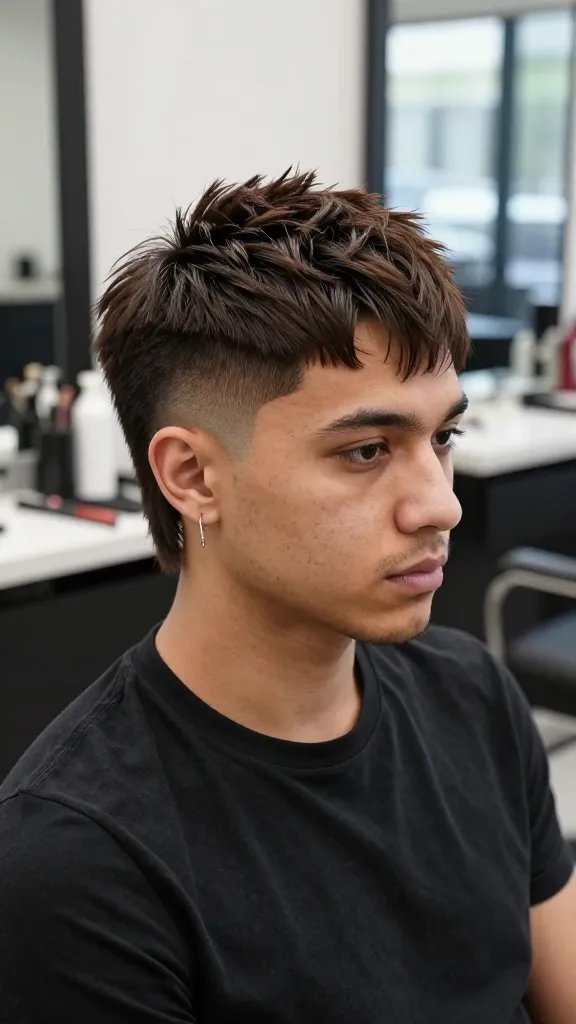
Want a big strip of volume down the center without committing to a full mohawk? A layered faux hawk gives you height exactly where you want it while keeping the sides clean.
How to nail it:
- Ask for gradually shorter sides with layered length along the strip
- Apply volumizing mousse at the roots before drying upward
- Use matte clay and pinch the top into peaks for texture
Great for nights out or whenever you want a bit of attitude. The height down the middle tricks the eye into seeing thicker hair overall.
20. Layered Crew Cut With Textured Top
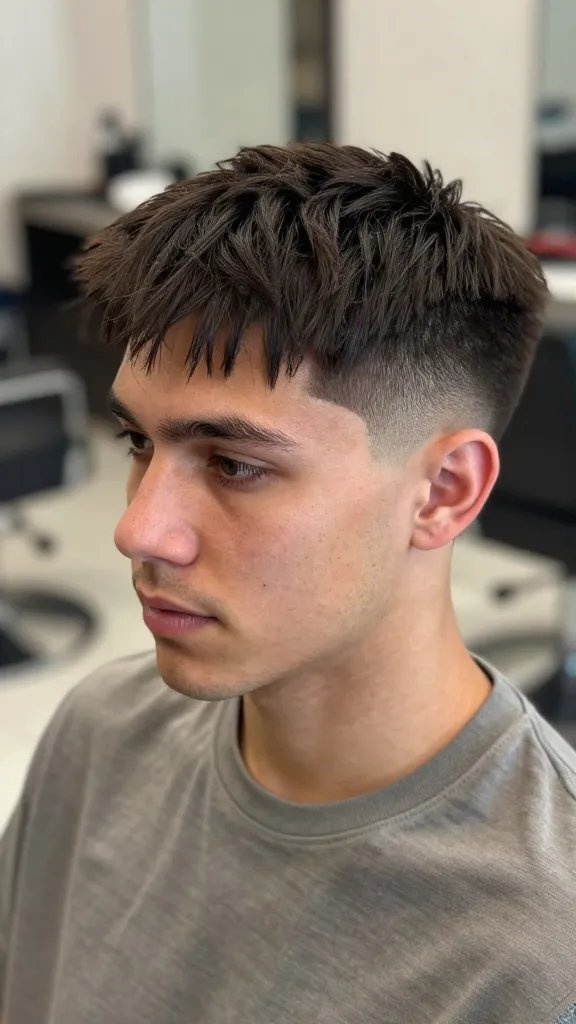
Short doesn’t have to mean flat. A layered crew uses small length variations on top to catch light and build density without growing anything out.
Key details:
- Keep the top around 1 to 2 inches with point-cut texture
- Fade or taper the sides for contrast that makes the top look fuller
- A bit of dry shampoo or texture powder gives instant lift
Low effort, high payoff. This one’s perfect for gym regulars and anyone who wants a thicker-hair look without the upkeep.
21. Long Layered Top With Blowout Volume
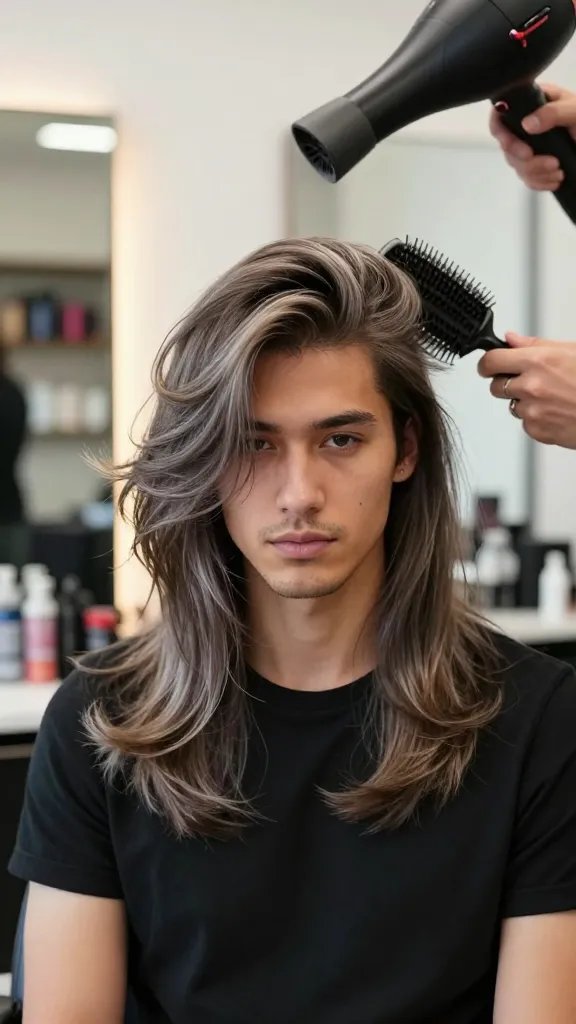
More length means more potential drama, if the layers are right. A long top with stacked internal layers can go from flat to full with one solid blowout.
Styling routine:
- Work in heat protectant and volumizing spray at the roots
- Blow-dry with a round brush, lifting sections at the crown
- Lock it in with light hairspray or a sea salt mist for texture
Save this one for date nights, events, or any time you want your hair doing some of the talking for you.

